
How to Adjust a Crossbow Scope: Practical Guide for 2026
Master how to adjust a crossbow scope with step-by-step guidance on zeroing, speed dials, and holdovers for November 2026.
 By John Snow
Updated November 10, 2026
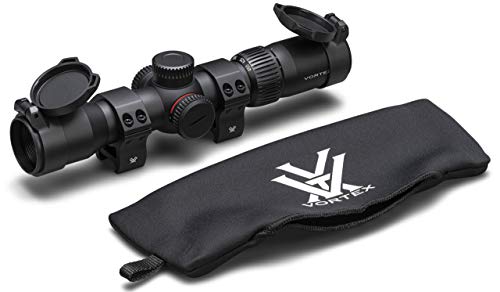

Achieving pinpoint arrow placement at variable distances requires a thorough understanding of how optical adjustments interact with high-energy archery tackle. Modern crossbows launch short, heavy projectiles that drop significantly faster downrange than centerfire rifle bullets. Learning how to adjust a crossbow scope allows hunters and target archers to eliminate sighting error, account for steep downrange drop, and maximize downrange kinetic energy transfer. Solid optical performance begins with secure mounting, precise reticle focus, and systematic turret adjustments that reflect your specific arrow weight and arrow flight velocity.
Many shooters struggle with wandering groups or inconsistent trajectory markers simply because their optics were calibrated without considering arrow speed or mechanical ring tension. Using stable rests and appropriate precision scope rings prevents subtle optic movement under the harsh forward and backward recoil impulses generated by crossbow limbs. Taking time to dial in your elevation, windage, and ballistic speed ring ensures your reticle holdovers remain true from close timber encounters out to longer field targets. This walkthrough outlines the mechanical steps needed to calibrate your optic for consistent accuracy throughout the season.
| Award | Product | BSP Score About BSP ScoreThe BSP Score is our own rating from 0 to 10, based on performance, design and build, ease of use, and value. It reflects independent research and is never influenced by manufacturers, retailers, or affiliate commissions. Learn more › | |
|---|---|---|---|
| Best Overall |
Vortex Crossfire II 2-7x32 Second Focal Plane
|
8.9/10 | Buy |
| Best Budget |
 CVLIFE 1.5-5x32 Crossbow Scope |
8.6/10 | Buy |
| Best Premium |
 Garmin Xero X1i Crossbow Scope |
8.6/10 | Buy |
 TenPoint Vision HD 3-12X Digital Rangefinding |
8.0/10 | Buy | |
 CVLIFE 1.5-5x32 Crossbow Scope |
7.8/10 | Buy |
Comprehensive Guide to Crossbow Scope Adjustment and Zeroing
Calibrating a crossbow optic requires a different mechanical approach than zeroing a traditional rifle scope. Because crossbow bolts shed velocity rapidly and follow an exaggerated parabolic arc, modern crossbow scopes utilize specialized reticles with multiple holdover markers, velocity-compensating magnification rings, or digital ranging sensors. Mastering these mechanisms ensures your aim point matches your bolt impact point across varying field conditions.
Understanding the Mechanical Dynamics of Crossbow Trajectory and Reticles
Crossbow projectiles experience considerable aerodynamic drag and downward gravitational acceleration within the first fifty yards of flight. To compensate for this steep arc, manufacturers incorporate ballistic drop compensating reticles with multiple horizontal crosshairs, chevrons, or illuminated dots. Each line beneath the primary crosshair corresponds to an increased distance interval, typically set in ten-yard increments from twenty to sixty yards or beyond.
The spacing between these holdover markers is geometrically tied to the physical scale of the reticle within the optic housing. In second focal plane scopes, such as the Vortex Crossfire II 2-7×32 Second Focal Plane or the CVLIFE 1.5-5×32 Crossbow Scope, changing magnification physically alters the apparent distance between the reticle subtensions relative to the target image. Manufacturers take advantage of this optical behavior by calibrating the magnification ring to match specific arrow velocities measured in feet per second. When you set the speed selector ring to match your crossbow output, the reticle spacing aligns with the actual downward curve of your bolt flight path.
Understanding this relationship prevents common sighting errors during field use. If the speed ring or magnification is accidentally moved away from your calibrated setting on a standard second focal plane optic, your extended distance holdovers will no longer impact where the crosshairs indicate. Premium models often incorporate firm ring resistance or dedicated speed locking collars to preserve that critical alignment.
Preparing the Crossbow, Rest, and Target Setup Safely
A dependable zero requires eliminating human handling error during the sight-in process. Begin by setting up a dedicated shooting bench or stable prone rest with sandbags or a mechanical crossbow shooting cradle. Unsupported shooting introduces muscle fatigue and canting errors that make it difficult to determine whether erratic impacts stem from optic dials or physical wobble.
Always inspect your crossbow and cocking mechanism before launching arrows during calibration. Verify that the rail is properly lubricated according to manufacturer instructions, the string servings show no excessive wear, and your bolts match the minimum grain weight specified for your setup. Using arrows with identical broadheads or field points of uniform weight is necessary because varying tip mass changes velocity and alters your vertical point of impact. Setting up on a quiet range with techniques similar to those found in our bench shooting optics guide helps isolate mechanical variables from human instability.
Safety must remain the primary concern during live-fire adjustment sessions. Crossbow limbs generate significant kinetic force and wide sweep paths upon release, meaning fingers must always stay below the safety wings on the foregrip. Never dry-fire a crossbow under any circumstance, as the sudden release of unabsorbed energy can shatter limbs, snap cables, and damage internal scope components. Position a heavy-duty archery target backstop rated specifically for high-velocity crossbow bolts against a safe, natural berm before taking your opening shot.
Calibrating the Fast-Focus Eyepiece and Ocular Diopter
Before adjusting any turret screws or speed selectors, you must sharpen the reticle image to match your personal eyesight. The ocular diopter focus ring, located at the rear housing of the scope, adjusts the optical assembly to project crosshairs sharply onto the shooter retina. If the diopter is misadjusted, the reticle will appear fuzzy or cause eye strain during prolonged aiming sessions.
To calibrate the fast-focus ocular ring, point the unloaded crossbow at a blank, uniform background such as a clear blue sky or an open light-colored wall. Glance through the optic for no more than two seconds at a time. Looking through the scope for extended periods causes the human eye lens muscles to compensate for optical blur, giving a false impression of sharpness.
Rotate the diopter ring until the crosshairs snap into crisp, immediate focus the instant you look through the ocular lens. Once you achieve sharp edge definition without eye strain, leave this setting in place. Adjusting the ocular diopter only focuses the reticle lines, not the target image or the downrange yardage calibration.
Establishing the Primary Baseline Zero at Twenty Yards
Virtually all standard crossbow scopes require establishing a baseline zero with the top crosshair at a known initial distance. While some high-speed setups or specialized models designate a thirty-yard or forty-yard primary baseline, twenty yards remains the standard starting distance for conventional optics. Sighting in at closer distances minimizes downrange arrow drift caused by mild crosswinds or major initial alignment errors.
Begin by securing your target precisely twenty yards from the front tip of your crossbow stirrup. Cock the bow using your standard rope cocker or integrated crank to ensure uniform string tension across both limb tips. An unevenly drawn string shifts arrow launch geometry laterally, creating artificial horizontal grouping issues that cannot be resolved through turret adjustments.
Aim your topmost reticle crosshair at the center bullseye and fire a single shot or a tight two-arrow control group. Do not aim at previous impact holes if shooting high-speed projectiles at close distances, as tight grouping can easily robin-hood or damage expensive carbon shafts. Measure the physical distance horizontally and vertically from your target aim point to the arrow shaft entry point before touching your scope turrets.
Deciphering Turret Mechanics: Elevation and Windage Adjustments
Crossbow scope turrets operate using threaded internal erector tubes backed by tension springs. Removing the protective turret caps reveals the elevation dial on top of the scope body and the windage dial on the right-hand side. Most crossbow scopes feature click adjustments calibrated in minute-of-angle increments, with common values measuring one-quarter inch or one-half inch of movement per click at one hundred yards.
Because you are adjusting the optic at twenty yards rather than one hundred yards, the physical impact movement per click is substantially smaller. For an optic with one-quarter MOA clicks, one click moves the point of impact approximately one-twentieth of an inch at twenty yards, meaning it requires roughly twenty clicks to shift your bolt impact one full inch. Scopes featuring one-half MOA clicks require approximately ten clicks per inch of shift at that same distance.
Directional arrows stamped onto the turret dials indicate where the point of impact moves when dialed. If your arrow strikes three inches low and two inches to the left of the bullseye at twenty yards, turn the top elevation dial in the direction marked UP and the side windage dial in the direction marked R. Fire another confirmation shot after dialing your calculated clicks to confirm that the topmost crosshair now splits the target center.
Calibrating Speed Rings and Feet-Per-Second Dials
Once your top crosshair is dead-on at your baseline distance, you must calibrate the secondary holdover markers using the optic velocity selector. Crossbow scopes such as the CVLIFE 1.5-5×32 Crossbow Scope and the Vortex Crossfire II incorporate an adjustable speed ring marked with velocity gradations ranging from 300 up to 450 or 460 feet per second. This dial alters internal magnification to expand or compress the visual spacing between holdover lines.
If you know your exact arrow speed through a digital chronograph, rotate the speed ring to that numbered velocity mark as an initial starting point. If you do not have chronograph data, use the manufacturer advertised crossbow speed minus an allowance for heavier aftermarket hunting arrows and broadheads. Move your shooting position back to forty or fifty yards, depending on what your specific scope manual designates for secondary calibration.
Aim at the bullseye using the corresponding forty-yard or fifty-yard reticle marker without touching the top elevation turret. If your bolt impacts lower than the target aim point at this extended distance, your arrow is flying slower than the current optic setting, which means the speed ring must be dialed down to a lower feet-per-second number to widen the reticle gap. If your bolt impacts higher than the aim point, the arrow is traveling faster than estimated, requiring you to turn the dial toward a higher velocity setting until impacts align.
Confirming Trajectory Holdovers at Extended Yardages
After locking in the speed ring calibration at mid-range, shooters must verify all remaining holdover crosshairs across their entire shooting envelope. Set targets at thirty, fifty, and sixty yards to confirm that your intermediate and extended lines reflect actual arrow drop. Small variations in arrow fletching drag, vane offset, and broadhead profile become progressively more pronounced beyond forty yards.
Environmental conditions also influence extended holdover verification. Dense cold air during late hunting seasons creates more aerodynamic drag on broadheads than warm early-season conditions, slightly increasing vertical drop at extended distances. Taking field notes on where arrows impact during varying ambient temperatures helps hunters avoid unexpected high or low strikes when targeting game.
Never attempt to fix a vertical error at extended range by altering your main elevation turret once your twenty-yard baseline is locked. Changing the elevation dial will disrupt your primary zero and throw off every single holdover marker along the entire reticle stem. Fine-tune extended elevation discrepancies exclusively using minute adjustments on the speed selector ring.
Digital and Auto-Ranging Optic Calibration Considerations
Advanced digital sighting systems like the Garmin Xero X1i Crossbow Scope and the TenPoint Vision HD 3-12X Digital Rangefinding utilize microprocessors and integrated laser rangefinders instead of manual glass reticle subtensions. These optics measure the direct line-of-sight distance to the target and instantly illuminate a single, precise aiming dot adjusted for arrow drop. Calibrating these systems requires entering digital setup menus rather than turning mechanical speed rings.
During initial setup, these smart optics prompt the user through an integrated zeroing protocol. For example, digital systems often utilize a single-shot or multi-step guided screen prompt where the shooter aligns an on-display digital reticle over the physical hole made by the arrow at twenty or thirty yards. Once the primary baseline is saved, you enter your chronographed arrow speed or fire confirmation arrows at longer yardages so the onboard ballistic computer can build a tailored flight curve.
Electronic optics provide substantial benefits by eliminating reticle clutter and compensating for shot angle on elevated treestands. However, shooters must regularly check battery levels and confirm that lenses remain clean of moisture or debris that could impede laser reflection. Keeping backup CR123A or lithium rechargeable power sources on hand ensures consistent operation during cold-weather outings.
Diagnosing Inconsistent Groups and Wandering Zero Symptoms
When adjustments fail to produce consistent groups on target, shooters often assume the scope erector system is defective. While internal mechanical failures can occur, erratic arrow flight is more frequently caused by external mechanical issues or inconsistent archery tackle. Identifying these symptoms methodically saves wasted time and ammunition on the range.
Inspect arrow components closely if impacts scatter unpredictably. Slightly bent carbon shafts, damaged moon or capture nocks, loose field points, and torn vanes cause erratic planing in flight. Number your arrows with a silver pen and shoot them in sequence to determine if one specific shaft consistently flies outside the main group cluster.
Check the crossbow cocking symmetry and flight deck for signs of uneven friction. If the cocking rope hooks are placed off-center during the draw stroke, one limb is loaded with more potential energy than the other, introducing severe lateral grouping spread. Ensuring consistent cocking alignment often resolves horizontal dispersion that users mistakenly attempt to dial out using the windage turret.
Verifying Mount Integrity, Ring Torque, and Reticle Alignment
Crossbows produce a distinct, snappy forward recoil impulse when the limbs reach full extension and the string stops abruptly against dampener bumpers. This violent mechanical shock can easily loosen mounting screws, shift scope bodies inside ring channels, and sheer low-grade aluminum fasteners. Inspecting your mounting hardware is a vital diagnostic step whenever zero retention becomes questionable.
Use a quality inch-pound torque wrench to confirm that scope base screws and ring cap fasteners meet manufacturer specifications. Typical scope rings require fifteen to eighteen inch-pounds of torque on ring caps and thirty to thirty-five inch-pounds on rail crossbolts. Over-tightening ring caps can crush thin-walled aluminum main tubes and bind internal erector springs, while under-tightening allows the optic to slide under repeated forward recoil pulses.
Ensure the vertical crosshair is plumb relative to the crossbow rail before final tightening. Canting the crossbow even a few degrees to the side causes arrows to impact low and away from the canted direction at extended distances. Using small bubble levels on the rail and the flat top of the scope turret ensures proper mechanical leveling that keeps your holdovers vertically aligned downrange.
Taking a structured, patient approach to zeroing and velocity matching guarantees that your crossbow optic delivers dependable ethical accuracy when field opportunities arise. Once your primary zero, speed dial, and mounting hardware are fully locked down, conduct periodic confirmation checks from field shooting positions to maintain peak confidence throughout the hunting season.
About the author
John Snow is an established outdoor journalist and equipment editor with decades of experience covering technical innovations, product evaluations, and outdoor equipment. His background in investigative reporting and technical journalism provides a strong foundation for explaining complex product specifications and helping consumers understand equipment performance.