
What Is Moa on a Red Dot Scope: A Practical Guide for 2026
Learn what is moa on a red dot scope, how angular subtensions impact shot placement, and how to pick the right reticle size for November 2026.
 By John Snow
Updated November 8, 2026


Achieving fast target acquisition and reliable shot placement often comes down to understanding how your optic projects its aiming reticle downrange. When new shooters transition from traditional crosshairs to non-magnified reflex sights, the term Minute of Angle frequently creates confusion regarding reticle dimensions and adjustment mechanics. Grasping what is moa on a red dot scope allows you to calculate exactly how much of your target the illuminated dot covers at varying distances, whether you are plinking on a rimfire range or setting up a defensive carbine. It also dictates how many clicks on your elevation and windage turrets are required to shift your point of impact directly onto the bullseye.
Optical subtension forms the mechanical foundation of modern non-magnified sighting systems. If you deal with visual distortions or reticle flaring, exploring a micro red dot for astigmatism guide provides additional perspective on keeping illuminated points sharp and well defined. In the following sections, we examine the mathematical principles behind angular measurements, explore how different dot sizes function across diverse shooting disciplines, and detail the mechanics of zeroing your sight with precision.
| Award | Product | BSP Score About BSP ScoreThe BSP Score is our own rating from 0 to 10, based on performance, design and build, ease of use, and value. It reflects independent research and is never influenced by manufacturers, retailers, or affiliate commissions. Learn more › | |
|---|---|---|---|
| Best Overall |
UUQ Tactical 1x30mm Reflex Green/Red/Blue 3 MOA
|
8.8/10 | Buy |
| Best Premium |
 SIG SAUER ROMEO5 GEN I 1x20mm Waterproof Shooting |
8.8/10 | Buy |
| Best Value |
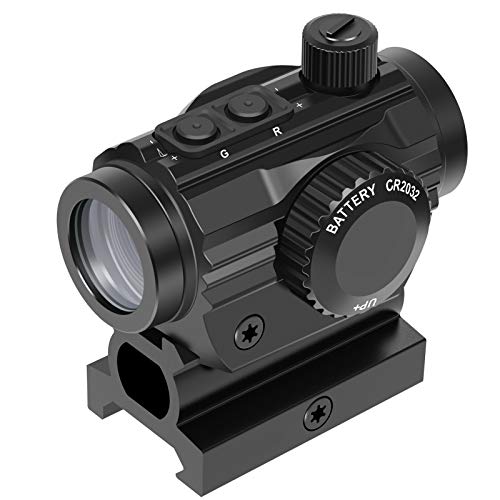 Feyachi RDS-36 1x22mm 5 MOA Red & Green Dot Sight |
8.4/10 | Buy |
| Best Budget |
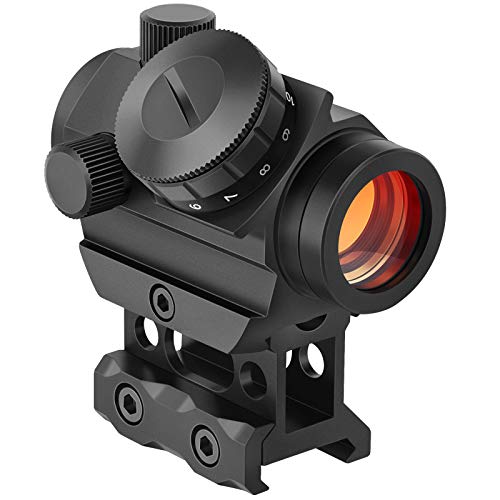 MidTen 2MOA Red Dot Sight |
7.8/10 | Buy |
Understanding Minute of Angle Mechanics on Red Dot Scopes
A Minute of Angle is an angular unit of measurement equal to one-sixtieth of a single degree of arc. Because it describes an angle originating at the optical lens and expanding outward into the distance, the physical space an MOA covers grows proportionally as the target moves farther away. At exactly 100 yards, one true MOA covers 1.047 inches, which shooters and scope manufacturers almost universally round down to an even one inch for quick field mathematics. Understanding this simple expanding cone is the core requirement for predicting shot placement, reticle coverage, and turret adjustments across all non-magnified optical platforms.
The Mathematics of Target Subtension at Varied Distances
Subtension describes the physical area of the target that the aiming point obscures at a specific range. Because red dot scopes do not use magnification, the projected illuminated dot remains an angular measurement rather than a fixed physical size. A dot that measures 2 MOA will always remain 2 MOA in the optical system, but its physical target footprint changes as you adjust distance. At 100 yards, a 2 MOA dot covers approximately two inches of target area, allowing precise shot placement on small silhouettes.
When you bring the target closer, the physical area covered by that same dot shrinks in linear proportion. At 50 yards, that identical 2 MOA dot covers exactly one inch of the target face. When you move forward to a 25-yard pistol or carbine distance, the dot covers only half an inch of paper. Conversely, pushing your target out to 200 yards causes that 2 MOA dot to cover four inches of target space, which illustrates why smaller dots are favored by shooters engaging distant steel plates.
Larger reticle configurations follow the exact same angular geometry but obscure a broader footprint. For instance, a 5 MOA dot will obscure approximately five inches at 100 yards, two and a half inches at 50 yards, and one and a quarter inches at 25 yards. This scaling behavior explains why choosing an optic reticle requires balancing rapid visual recognition against the physical precision required for your shooting discipline.
Turret Adjustment Clicks and Angular Corrections
Minute of Angle applies not only to the size of the projected LED reticle, but also to the mechanical tracking dials hidden beneath the turret caps. When you adjust the windage or elevation screws on an optic, each mechanical click moves the internal light emitter by a predetermined fraction of an angular minute. High-magnification precision scopes frequently utilize fine 1/4 MOA clicks, whereas compact non-magnified red dot sights typically utilize coarser 1/2 MOA or 1 MOA increments to allow rapid field zeroing without excessive turning.
If your red dot sight features 1/2 MOA per click adjustments, two individual clicks will shift your point of impact by one inch at a full distance of 100 yards. If your target is positioned at 50 yards, those same two clicks will shift your group by only half an inch. At a close defensive distance of 25 yards, you will need to dial eight complete clicks to achieve a full one-inch shift on paper. Knowing your optic turret values prevents wasted ammunition and eliminates the trial-and-error approach during your zeroing session.
It is equally critical to verify that your adjustment adjustments track consistently along both horizontal and vertical planes. Turret housings on compact reflex optics use small spring-loaded erectors to tension the internal diode carrier against the adjustment screws. Turning the dial in the direction indicated by the housing arrow will reliably track the point of impact when the internal mechanics are manufactured within tight tolerances.
Comparing 2 MOA, 3 MOA, and 5 MOA Reticle Profiles
Selecting the ideal dot diameter requires evaluating your typical engagement distances and the size of your targets. A 2 MOA dot, such as the reticle found on the SIG SAUER ROMEO5 GEN I 1x20mm Waterproof Shooting sight or the MidTen 2MOA Red Dot Sight, is widely regarded as the industry benchmark for general carbine applications. The small dot provides enough precision to cleanly aim at a clay pigeon or a six-inch steel plate at 100 yards without obscuring the entire target face.
Intermediate reticle sizes, such as the 3 MOA profile offered on the UUQ Tactical 1x30mm Reflex Green/Red/Blue 3 MOA sight, strike a balanced middle ground between pinpoint precision and rapid target acquisition. Shooters running practical carbines or pistol-caliber platforms often appreciate how easily the human eye locks onto a 3 MOA emitter under rapid movement. It remains fine enough for torso-sized steel engagements at 100 yards while offering slightly faster pick-up during high-speed split transitions at 15 to 25 yards.
On the larger end of the spectrum, a 5 MOA dot, featured on optics like the Feyachi RDS-36 1x22mm 5 MOA Red & Green Dot Sight, prioritizes extreme acquisition speed over long-distance target resolution. When shooting at close quarters, during rapid shotgun target drills, or while operating under dynamic lighting conditions, the larger dot immediately commands the shooter focus. However, because a 5 MOA reticle covers five inches of space at 100 yards, it can easily blot out small bullseyes, making tight target grouping at extended distances noticeably more challenging.
Illumination Intensity, Optical Flare, and Perceived Dot Size
The stated MOA measurement of any red dot optic assumes that the emitter intensity is balanced correctly against ambient environmental lighting. When you dial an illumination knob to its highest setting inside a dim room or during overcast conditions, optical blooming and starburst effects will distort the dot. This optical flare makes a factory-calibrated 2 MOA dot appear to the human eye as an irregular 6 MOA or 8 MOA blob. Over-brightening obscures fine target details and degrades shot placement accuracy.
Proper reticle management requires selecting an illumination level that provides immediate visual contrast without introducing bleeding red light around the lens edges. Quality optics offer extensive brightness steps to handle shifting lighting thresholds, such as the 10 illumination settings on the SIG SAUER ROMEO5 GEN I 1x20mm Waterproof Shooting sight or the 11 brightness levels available on the MidTen 2MOA Red Dot Sight. Setting your intensity so the dot appears slightly translucent against the target allows you to see the exact center of the bullseye through the illuminated reticle.
Shooters who also run secondary sighting systems, such as a back-up unit referenced in our angled red dot sight guide, often rely on lower dot settings to preserve precision when canting the rifle. If you notice a distorted or flaring dot even at moderate brightness, step outside into bright daylight to confirm whether the issue stems from optical blooming or a mild natural eye astigmatism.
Mounting Configurations, Rail Fitment, and Optical Co-Witness
Physical mounting stability is just as vital as angular calculations when preserving your zero over thousands of rounds. A sight that shifts even a fraction of a millimeter on its rail will introduce massive angular tracking errors downrange. Many entry-level and tactical optics feature mounting systems engineered for standard 20mm Picatinny rails, while select versatile designs like the UUQ Tactical 1x30mm Reflex Green/Red/Blue 3 MOA optic include hardware compatible with both 11mm dovetails and 20mm rail systems. Checking rail dimensions before installation prevents loose clamp fitment and damaged crossbolts.
Mount height directly dictates your cheek weld and determines how your iron sights align through the optical tube. An absolute co-witness setup, often provided by riser heights around 0.83 inches like that included with the Feyachi RDS-36 1x22mm 5 MOA Red & Green Dot Sight, aligns the red dot directly on top of your factory iron sight posts. In this configuration, your front sight post sits in the exact mechanical center of the optic tube when looking through the peep sight.
Alternatively, a lower one-third co-witness setup, typical with 1.41-inch risers, places the optical axis slightly higher than the iron sights. This raises your aiming dot into the clear upper window of the optic housing while leaving your iron sights visible in the lower third of the glass. Shooters running tactical drills frequently prefer this extra clearance because it keeps the sight picture uncluttered while maintaining emergency backup sights ready for immediate use.
Field Zeroing Procedures Using Minute of Angle Graduations
Zeroing your non-magnified optic efficiently requires matching your target distance to your turret click values. Prior to live fire, ensure the firearm is completely unloaded with the magazine removed, the chamber inspected, and the muzzle pointed safely downrange. Secure the firearm in a steady bench rest or shooting vise to eliminate shooter-induced movement. A preliminary mechanical bore-sight at 25 yards will ensure your initial shots land safely on paper before dialing fine adjustments.
Fire a steady three-shot group at your chosen initial distance, then measure the distance from the center of the group to your intended point of aim. If your bullet impacts two inches low and three inches right at 50 yards, you must translate those linear inches into angular minutes. On an optic with 1/2 MOA clicks, one MOA equals half an inch at 50 yards, which means each single click moves your impact point by one-quarter of an inch at that distance. You would turn your elevation turret eight clicks in the up direction and your windage turret twelve clicks to the left.
Shooters calibrating optics for rimfire or compact airgun applications can reference our red dot sight for airguns review to see how short-range trajectory curves impact zeroing choices. Once your group lands consistently on the bullseye, verify zero retention by firing an additional confirmation group. Secure all turret caps firmly to protect the internal adjustment mechanisms from moisture and debris.
Practical Considerations for Defensive, Hunting, and Plinking Setups
Deciding which MOA configuration aligns with your shooting goals depends heavily on the intended operational environment. For home defense and close-quarters carbines, visual speed takes precedence over surgical paper-punching precision. A moderately sized dot paired with motion-activation technology, such as the MOTAC system on the SIG SAUER ROMEO5 GEN I 1x20mm Waterproof Shooting optic, ensures the sight powers up instantly upon movement without draining battery life during static storage.
For woodland hunting or brush guns engaging targets within 75 yards, high-contrast illumination and weather resistance are paramount. Multi-color illumination options, such as the selectable red and green reticles on the Feyachi RDS-36 1x22mm 5 MOA Red & Green Dot Sight or the three-color system on the UUQ Tactical 1x30mm Reflex Green/Red/Blue 3 MOA model, allow hunters to contrast their aiming point against dense green foliage or dark timber backgrounds. Nitrogen purging and dependable O-ring sealing prevent internal glass fogging when transitioning between cold vehicles and damp morning hunting environments.
Casual plinking and weekend range training often benefit from flexible brightness controls and multi-height mounting systems. The MidTen 2MOA Red Dot Sight provides two distinct riser heights and multiple brightness settings, making it an adaptable choice across various flat-top rifle configurations. Evaluating these mechanical characteristics alongside your target size ensures your optic provides clean visual resolution, consistent mechanical tracking, and dependable performance every time you press the trigger.
About the author
John Snow is an established outdoor journalist and equipment editor with decades of experience covering technical innovations, product evaluations, and outdoor equipment. His background in investigative reporting and technical journalism provides a strong foundation for explaining complex product specifications and helping consumers understand equipment performance.