
How to Sight in a Red Dot on a Shotgun: A Practical Step-by-Step Guide for 2026
Master how to sight in a red dot on a shotgun for turkey hunting, home defense, or slugs with proper bore sighting, mounting checks, and live-fire patterning in November 2026.
 By Edward Ting
Updated October 20, 2026

Mounting an electro-optic to a smoothbore or rifled barrel transforms how quickly you acquire targets, but understanding how to sight in a red dot on a shotgun requires a fundamentally different mindset than dialing in a precision rifle. Heavy 12-gauge recoil impulses punish loose mounting screws quickly, and the spread of buckshot or birdshot introduces patterning variables that standard target turrets cannot calculate on their own. Learning how to seat your optic, verify your bore alignment, and confirm point of impact ensures you get dependable accuracy when it counts most.
Whether you run a tactical platform for home defense, a turkey gun in tight timber, or a dedicated slug barrel for deer season, the zeroing sequence must remain methodical. Starting with a secure mounting base and using modern alignment tools like an in-chamber laser cartridge saves your shoulder and your ammunition budget. Shooters who also run variable-illumination options often find that pairing a reliable optic setup with a versatile dual-color reticle optic provides the contrast needed across dense woods and bright daylight shooting lanes.
| Award | Product | BSP Score About BSP ScoreThe BSP Score is our own rating from 0 to 10, based on performance, design and build, ease of use, and value. It reflects independent research and is never influenced by manufacturers, retailers, or affiliate commissions. Learn more › | |
|---|---|---|---|
| Best Overall |
 CVLIFE 1X22X33 Red Green Dot Sight |
8.8/10 | Buy |
| Best Budget |
 Feyachi Reflex Sight - Adjustable Reticle |
8.4/10 | Buy |
| Best Premium |
 Monstrum Ares X Pro Open Reflex Dot Sight |
8.1/10 | Buy |
 12GA Red Dot Laser Bore Sight in-Chamber Cartridge |
8.0/10 | Buy | |
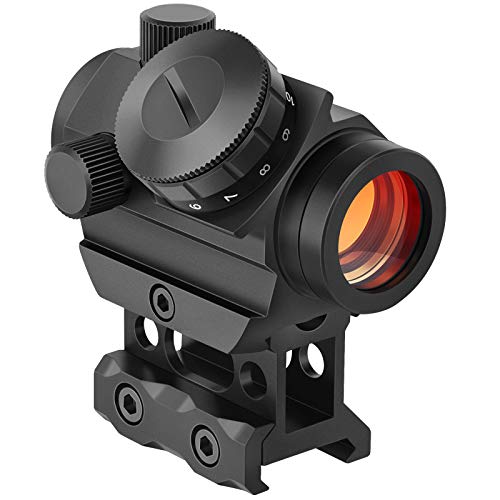 MidTen 2MOA Red Dot Sight |
7.8/10 | Buy |

Complete Step-by-Step Guide to Sighting In a Shotgun Red Dot
Establishing an exact zero on a shotgun bridges the gap between mechanical point of aim and ballistic point of impact. While rifles deliver single projectiles along predictable ballistic arcs out to several hundred yards, shotguns operate within tighter operational envelopes with massive recoil energy. A systematic zeroing process eliminates wasted ammunition, prevents physical fatigue from heavy defensive or hunting loads, and guarantees consistent shot placement in the field.
1. Mounting Security, Rail Prep, and Recoil Lug Engagement
Before chambering a single round or adjusting an elevation turret, you must confirm that the host shotgun is completely unloaded. Open the action, inspect the chamber visually and physically, and verify that the magazine tube contains no remaining shells. Mechanical stability is the single most common failure point when zeroing an optic on a 12-gauge or 20-gauge shotgun.
Shotgun recoil produces severe rearward acceleration followed by forward counter-recoil that easily rattles loose hardware. Inspect the receiver-mounted Picatinny rail or direct-mount plate to ensure all base screws are torqued down securely. Degrease the threaded mounting holes using a quick-drying solvent or isopropyl alcohol to remove factory packing oils that lubricate fasteners and encourage loosening.
Apply a small drop of medium-strength, removable blue threadlocker to each rail and cross-bolt screw. Never use permanent high-strength red threadlocker, which requires high heat to remove and risks damaging firearm receivers. Seat your optic clamp forward into the Picatinny cross-slot so the recoil lug directly contacts the forward rail lug face before tightening, which prevents back-and-forth shifting under sustained recoil.
Use a calibrated torque driver to secure cross-bolts strictly in inch-pounds according to manufacturer specifications, typically between 15 and 25 inch-pounds for optic rail clamps. Never guess fastener tension with handheld L-wrenches, and never use foot-pound torque tools. Excessive torque can warp lightweight aluminum optic housings, crush rail channels, or shear screw heads clean off during heavy firing.
2. Selecting the Best Zero Distance for Your Shotgun Role
Choosing an appropriate zero distance depends directly on your shotgun barrel type and intended ammunition. Unlike centerfire rifles that commonly zero at 50 or 100 yards, a shotgun optic should be calibrated to match the realistic engagement boundaries of the load you intend to fire. Setting your zero too far out results in significant mid-range height offset due to the rainbow-like trajectory of heavy shotgun projectiles.
For dedicated slug guns using rifled barrels or smoothbores with rifled choke tubes, a 50-yard zero represents the standard practical baseline. Modern sabot and traditional Foster-style slugs drop rapidly past 75 yards, but a 50-yard calibration keeps your trajectory within a narrow vertical band between 25 and 75 yards. This ensures ethical vitals hits on big game without extreme hold-overs or hold-unders.
For home defense shotguns running 00 buckshot or specialized defensive loads, a zero distance of 15 to 25 yards is ideal. At close home defense distances inside 7 yards, mechanical height-over-bore offset causes the pattern to impact approximately one to two inches below your illuminated dot. Zeroing at 15 to 25 yards keeps the tight central pattern core centered on target while keeping close-range offset minimal and predictable.
Spring turkey hunters running ultra-dense tungsten super shot or copper-plated lead should zero their optic precisely at 40 yards. Because specialized turkey chokes constrict pellets into a fist-sized core at close range, a misaligned red dot can cause complete misses at 15 yards. Dialing the core pattern density directly onto the reticle at 40 yards guarantees clean point-of-aim coverage across hunting ranges.
3. In-Chamber Laser Bore Sighting to Save Ammunition
Firing full-power shotgun shells solely to walk an uncalibrated reticle onto paper is noisy, physically jarring, and needlessly expensive. A dedicated 12-gauge in-chamber laser cartridge projects a bright red beam directly down the center axis of your bore to provide an immediate mechanical reference point. This pre-zeroing step allows you to dial your reticle close to true center from the comfort of a workbench or home dry-fire lane.
To use an in-chamber laser sighter, verify the shotgun is unloaded, install fresh batteries into the laser cartridge, and gently seat the unit into the chamber. Close the action smoothly without slamming the bolt or pump slide forward, allowing the extractor to capture the rim without displacing the laser housing. Point the muzzle toward an interior wall or safe target backstop at a measured distance between 15 and 25 yards under subdued lighting.
Look through your optic with both eyes open and locate both the projected laser point on the target and your optic reticle. Remove the protective windage and elevation turret caps on your sight. Using a flathead driver or adjustment coin, dial the elevation turret until the dot vertically matches the projected laser point, factoring in roughly one to two inches of optic height over the bore centerline.
Next, adjust the windage turret to shift the reticle horizontally until it sits in dead alignment with the laser beam. Rotate the laser cartridge slightly in the chamber if your extractor allows, checking that the beam does not trace an eccentric circle on the wall, which verifies bore concentricity. Once mechanical alignment is dialed, eject the laser cartridge and store it safely before heading to the firing range.
4. Live-Fire Zeroing Sequence Using Slugs on Paper
Laser bore sighting gets your optic on paper, but only live-fire testing confirms true ballistic impact against recoil forces. Begin your live-fire zero using solid slugs rather than shot pellets, even if your ultimate goal is shooting buckshot or hunting patterns. A slug punches a distinct, single hole in paper, eliminating the ambiguity of measuring a multi-pellet pattern center.

Position your shotgun securely on a solid benchrest using sandbags or a sturdy shooting rest to isolate shooter error. Place a large paper grid target with clearly marked one-inch squares at your chosen preliminary distance, typically 25 yards. Maintain a firm, consistent shoulder pocket weld and check your sight picture so your reticle dot rests undisturbed on the target bullseye.
Fire a steady three-shot group using the exact slug ammunition you intend to hunt with or stage for defense. Walk downrange to mark and measure the center point of the three-shot group relative to your point of aim. Measuring from the group center prevents you from chasing a single pulled shot or flinch induced by heavy shotgun recoil.
Calculate your adjustment value based on your optic turret click increments. Most shotgun-compatible reflex sights feature 1 MOA or 0.5 MOA click values, where 1 MOA equals approximately one inch at 100 yards, one-half inch at 50 yards, and one-quarter inch at 25 yards. If your three-shot slug group lands two inches low and one inch left at 25 yards, you will dial eight clicks of up elevation and four clicks of right windage on a 1 MOA turret optic.
Fire an additional three-shot string to confirm that the cluster shifts directly into the bullseye. If you plan to hunt with slugs at extended ranges out to 50 or 75 yards, move your target back to 50 yards after securing your 25-yard zero. Repeat the three-shot confirmation sequence at the final distance to account for projectile trajectory drop and barrel harmonics.
5. Confirming Buckshot Patterns and Pellet Distribution
Once your red dot is calibrated using slugs, you must pattern your defensive or hunting shot loads around that established mechanical zero. Different shot sizes, wads, velocities, and choke constrictions create wildly varying pattern densities. Sighting in is only complete when you verify where the central mass of your pattern strikes relative to the illuminated dot.
Staple a large target sheet, measuring at least 30 by 30 inches, onto the backer at your intended defensive distance, such as 15 yards. Aim dead center at a high-contrast dot with your optic and fire a single round of your chosen buckshot load. Observe the pellet distribution, identifying both the outer perimeter of the pattern and the dense central cluster of pellets.
The dense central core of the pattern should surround your point of aim evenly. If you notice the entire pattern cluster consistently prints three inches high or low compared to your slug impact, you may need a slight compromise adjustment. However, standard flight-control wads and modern defensive buckshot generally track very close to slug points of impact inside 25 yards.
Repeat this patterning test at various intermediate intervals, such as 5, 10, 15, and 20 yards, to map your shotgun pattern cone. Documenting how many inches your pattern expands at each distance provides confidence that every pellet remains on target during an emergency. It also reinforces the reality that a shotgun must be aimed with precision, debunking the myth that shotguns cannot miss at close range.
6. Troubleshooting Astigmatism, Parallax, and Wandering Zeros
Shooters occasionally experience zero drift, where their point of impact shifts unpredictably between shot strings. On a shotgun, a wandering zero almost always stems from loose rail attachment screws, sheared mounting cross-bolts, or a loose barrel retaining cap. Shotgun barrels on pump-action and semi-automatic platforms seat into the receiver via a threaded magazine cap, and if this cap vibrates loose under fire, barrel-to-receiver play ruins your zero instantly.
Another frequent issue involves reticle distortion, where the illuminated dot appears as an irregular smear, cluster of grapes, or starburst rather than a crisp circle. Before assuming your optic emitter is defective, perform the smartphone camera test. Point your phone camera through the optic window and take a photo of the illuminated reticle against a plain background.
If the dot appears crisp and perfectly round on your phone screen but looks blurry or smeared to your naked eye, the cause is physiological ocular astigmatism. Shooters managing this condition can explore our micro optic astigmatism guide to understand how different reticle colors, diopter systems, and lower brightness levels help sharpen aiming points. Lowering the sight brightness to match ambient light conditions often cleans up perceived reticle blooming immediately.
Parallax error can also cause subtle aiming deviations if your cheek weld shifts dramatically between shots. While most reflex sights are parallax-corrected beyond a short threshold distance, extreme peripheral viewing angles through small optical windows can introduce minor point-of-aim shifts. Centering the reticle in the optical window and practicing consistent cheek placement against the shotgun comb ensures the tightest possible shot dispersion.
7. Post-Zero Verification, Witness Marking, and Maintenance
Completing a range session does not conclude the sighting process; verifying hardware integrity is critical before placing your shotgun into service. Heavy shotgun recoil can stretch fastener threads or cause optic clamps to loosen gradually over time. After firing your final confirmation group, inspect every screw and clamp interface for any sign of mechanical play or movement.
Apply witness marks across the head of each mounting screw extending onto the optic base using a paint pen or bright lacquer. Witness marks provide an immediate visual indicator during routine cleanings, revealing if a screw has backed out even a fraction of a turn under recoil. If a witness line breaks alignment, you know the optic has shifted and must be re-torqued and re-zeroed immediately.
Clean your optical lenses carefully to remove unburnt powder residue, carbon blowback, and environmental dust accumulated during shooting. Use an optical lens pen or a soft blower brush to sweep away loose grit before wiping surfaces with a clean microfiber cloth. Never use harsh bore cleaners or petroleum-based solvents on optic lenses, as these chemicals strip anti-reflective coatings and compromise housing seals.
Finally, document your exact zero parameters, including the specific ammunition brand, shot size, projectile weight, and zero distance, in a field notebook or on a label inside your gun case. Different shotgun shells generate vastly different chamber pressures and velocities, which will alter your point of impact if you change loads later. With a properly mounted, bore-sighted, and live-fire confirmed red dot, your shotgun becomes an exceptionally fast and precise platform for hunting, competition, or home defense.
About the author
Edward Ting is an experienced amateur astronomer, telescope reviewer, and astronomy educator known for his detailed equipment evaluations. With an engineering background and extensive experience reviewing telescopes and astronomical accessories, he helps astronomy enthusiasts understand optical performance, equipment design, and practical considerations when selecting observing equipment.