How to Level a Scope on a Rifle: Practical Setup Guide for 2026
Master how to level a scope on a rifle to prevent reticle cant error and maximize shooting accuracy with proven bench techniques for September 2026.
 By bsr_admin
Updated September 28, 2026
By bsr_admin
Updated September 28, 2026
A missed impact at several hundred yards often traces back to a minor tilt in the optic rather than erratic wind or poor trigger control. When crosshairs tilt even a couple of degrees off true vertical, every click of elevation dialed into the turret pulls the bullet laterally off target while lowering downrange trajectory. Understanding how to level a scope on a rifle ensures your reticle aligns squarely with the gravity vector of the earth and the bore axis of the firearm. Shooters investing in precision optics or dependable hardware, such as those found on popular mid-tier hunting scopes, require absolute reticle plumb to extract full mechanical accuracy from their sighting system.
Mechanical cant creates compounding ballistic drift as target distances increase toward extended ranges. Fortunately, achieving perpendicular alignment between your optic erector system and the rifle action requires only patience, attention to detail, and simple tools like precision bubble levels or mounting wedges. Learning to manage scope ring torque in inch-pounds while tracking bubble migration prevents crushed main tubes and unwanted reticle twist during final ring tightening. With proper bench preparation and systematic alignment checks, any marksman can establish an uncompromising optical baseline that preserves downrange repeatability.
| Award | Product | BSP Score About BSP ScoreThe BSP Score is our own rating from 0 to 10, based on performance, design and build, ease of use, and value. It reflects independent research and is never influenced by manufacturers, retailers, or affiliate commissions. Learn more › | |
|---|---|---|---|
| Best Overall |
 EZshoot Scope Leveling Kit with Precision Bubble
|
9.2/10 | Buy |
| Best Value |
 Monstrum Rifle Scope Level Bubble | 30 mm Diameter
|
9.1/10 | Buy |
 EZshoot Scope Level 1 in Scope Bubble Level
|
9.1/10 | Buy | |
| Best Budget |
 CVLIFE Scope Level Fold Away Bubble Level
|
8.3/10 | Buy |
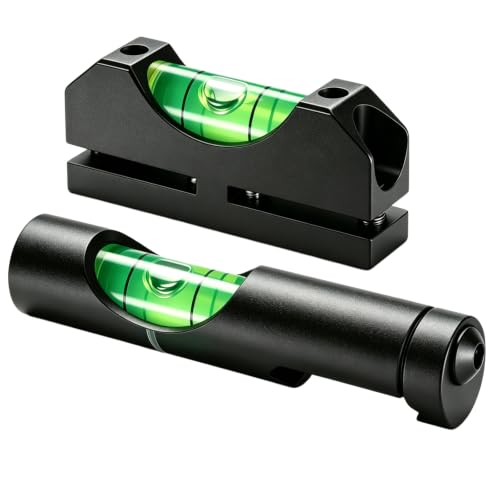 Scope Level Scope Leveling Kit High Precision
|
8.1/10 | Buy | |
| Best Premium |
 DISCOVERYOPT Scope Leveling Kit
|
8.0/10 | Buy |
The Mechanics and Execution of Precision Scope Leveling
Achieving true reticle alignment is one of the most critical steps when mounting an optic to any sporting or tactical rifle. A scope that sits crooked relative to the rifle bore will introduce frustrating point of impact shifts that worsen as target distances stretch. Learning the correct alignment workflow removes mechanical error from the ballistic equation. This guide breaks down the physics behind reticle cant, the most effective leveling tools, and the precise mechanical procedures needed to square your optic to the bore.
The Ballistic Cost of Scope Cant Error
Cant error occurs whenever the vertical crosshair of a reticle does not align with the true pull of gravity. When a shooter holds a canted rifle upright to make the reticle appear level, the rifle bore tilts underneath the optic. This tilt directs the muzzle slightly off to the side while simultaneously dropping the elevation path of the projectile. Even a subtle tilt of three to five degrees can displace a bullet several inches off target at intermediate distances of three hundred to five hundred yards.
The problem magnifies drastically when dialing elevation turrets for long-range target engagements. Turret erector systems travel strictly along their internal mechanical track, which moves parallel to the vertical reticle plane. If that vertical track leans off plumb, dialing twenty minutes of angle or six milliradians injects unintentional horizontal displacement into the shot. The shooter often blames shifting wind conditions for these misses, when in reality an unlevel reticle is steering the bullet off the target centerline.
Bench Setup and Firearm Safety Preparation
Precision work always starts with a safe and motionless workspace. Before attaching tools or adjusting hardware, visually and physically verify that the firearm chamber is clear and all ammunition is removed from the room. Lock the rifle securely into a rigid gun vise, bench rest, or clamping workstation so the rifle cannot wobble during the mounting process. A firearm that shifts midway through the alignment procedure will instantly ruin any level reference you establish.
Clean all mounting surfaces thoroughly using an isopropyl alcohol wipe or degreaser to remove manufacturing oils and carbon residue. Foreign debris between the receiver, scope rail, and ring saddles can introduce structural unevenness that torques the optic tube unevenly. Inspect the ring bottoms on the Picatinny rail to confirm they sit fully flush within the cross slots. Once the base hardware sits true, you can establish an accurate rifle reference level before resting the optic into the rings.
Scope Leveling Methods: Bubble Levels, Wedges, and Plumb Lines
Marksmen generally utilize three primary techniques to square an optic: dual bubble level systems, precision leveling wedges, or a physical plumb line. Dual bubble kits utilize a barrel or rail clamp reference level alongside a secondary magnetic bubble that rests on the optic turret cap. This dual-point system allows the user to balance the rifle action to the horizon and subsequently balance the scope to match the rifle. It remains one of the most adaptable systems across diverse rifle configurations.
Aluminum wedge systems operate on a mechanical rather than gravitational principle. These tools slide directly into the gap between the flat bottom of the scope turret housing and the flat surface of a one-piece mount or Picatinny base. As the wedges push together, they force the flat base of the scope parallel to the mounting surface below. This approach works rapidly on flat-bottomed modern tactical optics, though it cannot be used on scopes with rounded erector housings.
The plumb line method relies on suspending a weighted line or high-contrast vertical tape several yards downrange. The shooter levels the rifle receiver on the bench, looks through the glass, and manually aligns the vertical reticle wire with the plumb cord. While this technique directly references the physical reticle rather than the external turret cap, it requires adequate ambient light and calm conditions. Combining a plumb line check with bubble levels provides dependable cross-validation.
Step-by-Step Procedure: The Dual-Bubble Level Method
Begin by attaching a clamp level to the rifle barrel or the top rail of the receiver. Adjust the rifle in the vise until the reference level bubble settles dead center between the indicator lines, then lock the vise firmly in place. Tighten the clamp knob on the reference level so it reads level with the rifle, creating a benchmark that remains consistent throughout the process. Any slight movement of the bench can now be spotted immediately by glancing at this master reference indicator.
Place the rifle scope into the bottom ring saddles and loosely set the top ring caps in place with their screws threaded just enough to prevent the optic from falling out. Position the secondary level with its magnetic bottom resting flat on top of the scope elevation turret cap. Inspect the turret cap beforehand to ensure it presents a clean, flat surface without decorative badges that could cause the tool to rock. If the turret cap is domed or loose, remove the cap and place the magnetic base directly on the flat erector platform beneath.
Gently rotate the scope tube inside the loose rings by hand until the bubble on the turret level matches the orientation of the clamp level on the barrel. Move slowly, as fluid bubbles exhibit slight inertia and take a second or two to settle after minor adjustments. Ensure your eye relief and cheek weld are properly positioned before committing to the rotational position of the tube. Once both bubble vials display centered readings simultaneously, the optical axis aligns with the receiver plane.
Step-by-Step Procedure: The Wedging Method for One-Piece Mounts
Leveling wedges offer a swift mechanical solution when working with one-piece cantilever mounts and modern tactical scopes featuring flat-bottom housings. First, secure your mount to the rifle rail and set the optic into the rings with the ring caps installed loosely. Ensure the optic can slide forward and backward freely so you can establish correct eye relief for your natural shooting posture. Make certain there is an open channel directly underneath the center turret cluster where the wedge can enter unimpeded.
Select the appropriate wedge size for the gap clearance beneath your optic. Standard kits usually include a smaller wedge spanning clearances from roughly 0.180 inches to 0.559 inches, as well as a larger wedge bridging heights from 0.490 inches up to 1.053 inches. Gently slide the grooved ramp underneath the flat floor of the turret saddle. As the wedge slides forward along the base plate, it naturally pivots the optic until the flat underside of the erector housing sits flush against the wedge surface.
Maintain light forward finger pressure on the wedge while you begin snugging the ring cap fasteners. Do not force the wedge with excessive pressure, as driving it too aggressively can push the scope tube upward against the ring saddles and damage the aluminum housing. Once the ring screws reach initial hand resistance, slide the leveling wedge out from beneath the scope cluster. The flat surfaces will have forced the reticle into alignment, leaving the scope ready for final torque verification.
Torque Sequencing and Preventing Ring Twist
Securing the ring cap screws is the stage where most leveling errors accidentally occur. As threaded fasteners draw downward into aluminum or steel ring bodies, the rotational friction of the screw head grips the top ring cap and twists the optic tube underneath. Even a tiny fraction of a turn can roll a leveled scope out of alignment without the shooter noticing. Keeping your reference level installed on top of the turret allows you to monitor bubble movement during the entire tightening sequence.
Always tighten ring screws in an alternating cross-pattern, identical to the lug nut sequence on a vehicle wheel. Advance each screw by only a quarter-turn at a time to distribute downward clamping pressure evenly across both sides of the scope tube. Measure the physical gap between the upper and lower ring halves on both sides using feeler gauges or visual inspection to ensure the gaps remain symmetrical. Uneven ring gaps exert uneven pinch forces that can bind the internal erector assembly or cause optical distortion.
Fasteners must always be tightened using a calibrated inch-pound torque wrench rather than basic hand wrenches or foot-pound tools. Scope ring manufacturers typically recommend tightening ring cap screws to fifteen to eighteen inch-pounds, while base crossbolts securing the rings to the rail often require thirty to thirty-five inch-pounds. When setting up a high-performance system like an EOTech Vudu precision rifle optic, adhering strictly to factory torque values prevents tube pinching while keeping the reticle dead plumb. Over-torquing ring hardware risks denting the main tube, which permanently freezes internal erector tracking and voids warranties.
Mounting Dedicated Anti-Cant Indicators for the Field
A scope leveled perfectly on a workbench only provides true accuracy if the shooter holds the rifle level in the field. Natural terrain features such as sloping hillsides, angled tree lines, and uneven benches create powerful optical illusions that trick the human brain into canting the firearm. Installing a permanent anti-cant bubble level directly on the rifle or scope tube solves this environmental deception. These accessories let the marksman confirm rifle plumb with their non-dominant eye right before pressing the trigger.
Field bubble levels come in two primary mounting formats: tube-mounted rings and rail-mounted fold-away brackets. Tube levels attach directly around the scope body, commonly available in standard one-inch, thirty-millimeter, and thirty-four-millimeter diameters with integrated clamp hardware. Rail-mounted levels clamp directly onto an open slot of a Picatinny rail beneath the optic, often featuring swing-out arms that tuck flush against the receiver during storage. Both styles rely on high-visibility fluid to allow rapid visual verification in varied lighting conditions.
When installing a dedicated field level, you must calibrate it against the leveled bench setup before locking its screws. Leave the firearm secured in the leveled vise with the master reference bubble dead center. Position the field level onto the scope tube or receiver rail, gently rotating its housing until its internal bubble vial matches the bench level exactly. Locking down an uncalibrated field bubble will simply reinforce a canted shooting posture, defeating the purpose of installing the accessory on tactical rifle scopes used across extreme distances.
Range Verification: The Tall Target Test
Bench tools provide exceptional mechanical alignment, but live fire remains the definitive test of true reticle plumb. The tall target tracking test offers a straightforward way to confirm that your elevation erector travels precisely perpendicular to the horizon. Mount a large piece of poster board at exactly one hundred yards and use a carpenter level or plumb bob to draw a true vertical line down the center. Mark an aim point near the bottom of this line and set up the rifle on stable sandbags or a bipod.
Fire a three-shot baseline group directly at the bottom aim point to establish your zero. Next, dial upward on your elevation turret by twenty to thirty minutes of angle, or six to nine milliradians, while maintaining your crosshairs on the bottom aim point. Fire a second three-shot group and examine where the impacts land on the paper. If the upper group strikes squarely on the plumb vertical line, your reticle is perfectly plumb; if the group drifts to the left or right of the vertical line, your scope exhibits reticle cant and requires fine rotational correction.
Common Scope Leveling Mistakes to Avoid
One of the most widespread errors in optics mounting is attempting to level the reticle solely by eye against a distant object or the horizon. Human eyesight naturally accommodates to crooked backgrounds, especially on rolling ranges or uneven terrain, leading shooters to induce several degrees of cant unconsciously. Another common error is assuming that the outer top surface of an elevation turret cap is perfectly parallel to the reticle wire inside. On budget optics or scopes with loose dust caps, the cap may wobble, requiring the installer to reference the flat mechanical saddle underneath instead.
Installers also frequently neglect to recheck their level bubbles after torquing the final ring screw. Even with alternating torque patterns, ring caps can pull the scope tube slightly as thread friction reaches full clamping force. Always inspect both the barrel reference level and the optic level after reaching final inch-pound values. If the bubble has crept off center by even half a line width, loosen the ring caps slightly, counter-rotate the optic a hair, and re-torque until the bubble remains perfectly centered under full tension.
Taking the time to level your rifle scope properly transforms downrange marksmanship from an exercise in guesswork into a predictable mechanical science. By establishing a true receiver reference, using reliable bubble levels or wedges, applying calibrated inch-pound torque, and verifying tracking along a vertical plumb line, you eliminate reticle cant error at its source. This meticulous attention to mounting detail ensures that every elevation dial and windage holdover tracks true on target, giving you complete confidence in your optical system across every shooting distance.
About the author

bsr_admin writes reviews and buying guides for BSP Review.